 |
Bint Al Bahr Arabians Preservation Breeders of Straight Babson Egyptians |
![]()
Photo Tips
©2002
by Diana Johnson
You
can take your own photos and be pleased with the results.
It just takes planning and attention to detail. These ideas are to help
you take your own photos at a reasonable cost to pocketbook and to everyone’s
sanity. A good photo shoot is a
group effort and takes patience, practice and persistence.
Camera
For the
purposes of this article I am going to assume you are using a 35mm camera with a
zoom lens but these ideas can easily be applied to digital cameras or whatever you use.
Automatic film advance is very helpful as you do not have to take the camera
down from your eye after every frame to advance the film manually and lose some
valuable shots. Autofocus is quite
handy but I like the camera to also have a manual focus setting as there are
many times when autofocus gets in your way.
There is a slight delay time on autofocus that can cause you to miss
action shots that require quick response from your shutter. Legs
move faster than the camera so however well you thought you timed the leg to be
in the right place when you take the shot, the camera has its own timing on the
shutter using autofocus. An
automatic light meter also comes on most cameras but refer to your instruction
book for settings for your camera if it is manual.
Have you lost your camera’s instruction booklet?
Now might be a good time to order a new one (try the company website) since it will explain the
settings and how to use them to your advantage.
I use a 70-200mm Zoom lens on a Minolta 7000 but I used to use an old
Kodak Instamatic and did get some good shots once I learned how to correct for
the lack of a zoom and compensate for the lack of a "through the lens view
finder." That was hard work with
uncertain results so I am very grateful for a 35mm SLR camera.
Schedule your
“photo day” in advance, well before you need the photos.
It will take you time to sort, label and choose your photo.
Keep in mind you may need to repeat the photo session in case you did not
get just what you wanted in the first attempt.
A
few days ahead
Scout for
good background and lighting a few days ahead of the scheduled photo shoot. This
is the first step to getting a good photo. Choose
your location with light in mind. For
lighting, your shadow must point at the horse.
It is best to look for your location at the time of day that you will be
shooting. The softer light of early
morning or early evening will keep your shadows to a minimum. The soft light
from a bright hazy day will also work for you with the added advantage of not
having to worry about shadows. Select
a properly lit background that is level, uncluttered and suitable to the color
of the horse. Light colored horses
need to be shot against dark backgrounds and dark horses against light colored
backgrounds. This step may (or may
not) only take a few moments but it is important since it is a key factor in the
success of your project. The same
spot that worked so well in April may not work at all in June due to seasonal
light direction so recheck before each photo session.
A simple
uncluttered background helps to focus the attention on the horse. Consider the
trees and shrubs, will they add or distract from your photo? We once did
“horse trotting” photos with trees in the background and when we got them
back most of the photos had “broccoli” (trees) riding on the horses
hindquarters. A background of
a flowering tree may look great through the lens as you shoot it but when the
photos come back you may find the background is too busy and distracts from the
horse. If you just have to have
those beautiful roses in the background, shoot some more shots with a plain
background as a backup. Mow the
grass if needed so the horse’s feet will show.
If you can not find such a location consider whether your neighbor might
or even trailer out to a suitable location.
It always helps to have backup spot to shoot incase something isn’t
working in the selected location.
Buy LOTS of
film. Plan on more rolls than you will need. Ten rolls is not an unreasonable
amount to have on hand for 1 or 2 horses. You
may or may not need it all. Better
to have more film than you need than not enough.
I like 35mm 200ASA Fujifilm as I find that horse colors come out truer to
color with this film but a lot depends on who develops the film. It is also a
good idea at this time to locate your spare camera battery.
My camera batteries last me about a year but they usually quit on me when I most need
them so I now keep a spare one in my camera bag.
Remind the people that agreed to assist you of the time and day they need to be there. You will need a minimum of three people, with 4 being even better. You need at least three people, one to shoot the photos, one to hold the horse and one to get the ears up. If you found a fourth person, their job is to help with the grooming and to help the ears up person, handing props or bringing out another horse. Every job is very important and the results of any photo shoot is a team effort. Those of us who have tried to shoot photos by ourselves know the value of having help.
How do you get help? If you
don’t find prospective help at your dinner table then find a helpful friend
and agree to shoot photos or be their helper for of one of their horse’s photo
shoot the next weekend. I think we
all can agree, whatever the breed, we all need help getting photos taken.
Look at your
horse and be realistic about your horse’s beauty, work to emphasis her best
points. Look to see what angles she
looks best from then use them for your photo shot.
The
day before the photo shoot
Clean up the area to be used as background. Make sure the water hose is not snaking across the lawn. Check to make sure your neighbor hasn’t moved his tractor or truck into the selected background. Check your “ears up bag” to make sure you have some props to make that job go smoother. Some ideas to put in the bag (it can be a paper feed sack which can serve as an ears up on its own) include an umbrella, a plastic tarp, a large bed sheet for someone to cover up in and be a mystery monster (don’t let the horse watch the person put on the sheet), a shiny Mylar balloon from the grocery store, XXXX One of my favorite attention getters is using another horse that the horse you are photographing is not familiar with. Be all set up and ready to shoot before the strange horse or any ears upper makes its appearance. We also get good results using a dowel with a tassel of shiny metallic Christmas icicles taped to the end.
If
you are shooting a stallion, nothing gets his attention like another horse.
It makes him easy to pose as you can direct his attention wherever you
need it. With a mare sometimes
leading up a foal she doesn’t share a pasture with will put a gleam in her
eye. A neighbor’s dog or sheep or
anything that is not part of the horses routine has potential to work.
Getting the ears up is easier than getting expression.
That little bit of extra expression that lights up their eyes makes the
difference between a good photo and a wonderful photo.
Check the
halters or bridle and saddles you plan to use.
Make sure they are clean and in good repair and that they are adjusted to
fit the horse so you do not have to spend precious light time doing adjustments.
Put your grooming kit in a bucket, clean damp and dry towels, flywipe, mane brush and
body brush.
The
day of the photo shoot
RULE
NUMBER ONE OF PHOTO DAY – EXERCISE PATIENCE.
Be patient with your help, the photographer, the horse, as well as
yourself. Do not expect the photos
to come out perfect, just do the best you can.
Even the top professional photographers with their years of practice and
experience get more duds than gems on a roll of film.
Keep shooting film, even if you think you got exactly the shot you wanted
on the first roll, until the horse tires of the session and you can not rouse
his interest one more time. If you
suspect you did not get the shot you wanted due to lack of enthusiasm from the horse. Move to
him to another location so the horse is in an area he is not familiar with.
His attention may not focus where you want it but he may perk up and
maybe you can work it out and still get the shot you need. Remember - Patience
and persistence are the key ingredients for success.
Last minute
preparations should include cleaning out the nostrils and eye corners with a
clean damp towel, apply flywipe, and make sure the bridle path area is smooth.
For my situation this is important as I do not cut bridlepaths even on
our showhorses. Give the mane and
tail a final fluffing. Keep the mane
brush and damp towel with the ears up stuff so it is handy for touch ups during
the session. Don’t forget to check the fit of the halter, lay of the tassels
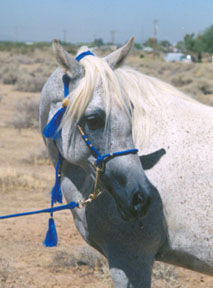
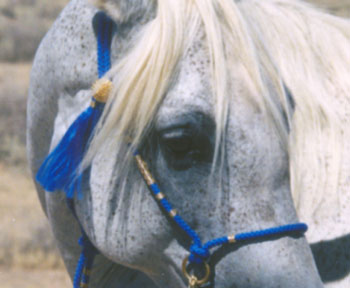
or position of the brow ornaments.
All of this should be rechecked by the handler and the ears up person during the
session.
As the
photographer you should stuff your pockets or fanny pack with film so you do not
have to run to your camera bag for new rolls.
Now you are
ready to shoot. Move the horse to the selected background.
Pay attention to where the sun hits the horse.
A slight repositioning of you or the horse may improve your photo
tremendously. If the horse’s face
is in shadow the resulting photo will lose those essential details of the face
even though it looks like it might be okay through your view finder. Move your
position and or have the horses head move to eliminate the shadow.
When taking
the photo hold your camera tight to your head with your elbows tight but relaxed
against to your body. Hold your breath as you squeeze the shutter button.
All this will help the clarity of your photo as well as insure your tight
framing of the shot hasn’t wandered off the intended target.
You should position yourself so you are shooting slightly up at the horse.
Stand well
back from the horse and use the zoom to bring the horse up close to you.
Being as far back as possible then zooming in will shorten the depth of
field which will blur the background slightly. It also will make your horses
proportions more realistic and avoid the “big nose, long face and tiny ears”
distortion that is so easy to get.
Only now when
the photographer is in position and ready to shoot should the horse see any of
the ears up stuff. The less time he
sees it, the longer he will retain his interest in it.
Show only one item at a time and start from farther away and move to
where the horse takes an interest in it. Stop and continue to show the object
and wait for the horse to lose interest. Listen for the photographer to direct
you in the angle of the horses interest. When
the horse is not longer interested do something different, move it differently
move closer to the horse. Watch the horse’s reaction for clues on what works. Ears
forward on a sleepy horse is not what
you are looking for.
The handler’s job
The handler's
job at this point is to follow the suggestions of the photographer in posing the
horse and try to keep out of the photo. Not an easy job! The
handler will need to be aware of where their hands are and to do their best to
keep them back away from the horse to avoid them becoming distracting elements
in the final photo. It really helps
the handler if the horse has a good whoa on him. Ask
the photographer if you can stand at the off side hip and still be out the photo
for headshots for a
horse that keeps moving forward.
It is also
the handler’s job to recheck the nostrils for dirt as well as check the mane and forelock
to make sure it does not cover the eyes.
For headshots
Tip
the horse’s head slightly towards you so you can just see the curve of the
opposite side’s eye is almost visible. This
will show the sculpting of the face, a broad forehead as well as the lovely
curve from eye to nostril. I
personally like a
natural loose full forelock, dry and fluffy not greased.
Frame the photo down onto the lower chest and leave plenty of space in
front of the nose as well as some space above the ears. Allow enough background
around the horse to allow slight cropping. If
later you want an 8x10 of a photo it will need cropping as a 35mm negative gives
too wide (or tall) an image for 8x10 so too close framing will not give your
photo its best look when blown up.
For posed body shots
For
side views stand even with the horse’s rib cage, check your background to see
if you can improve the shot by lowering or raising yourself to take out anything
that parallels the horse’s top line that may distract from the horse or make
his top line look strange. This also
applies to the belly line but not as critical.
Check to see if the background has enough contrast to let the horse stand
out. Think about how the horses in
the magazine photos you liked were posed and try to copy the pose.
It doesn’t hurt if you sat down with your helper prior to the photo day
and looked at the photos together discussing
how the pose might be duplicated. Once
you have done a few horses and can work together as a team, it will be easier
for the handler and ears up helper to
understand what the photographer wants and how to get the pose when they ask for
a “more upright stance” or “more neck” for example.
Undersaddle Shots
Remind
the rider that they always have to have their “ears up”
and you will be watching
the horse’s expression and leg movements not theirs. Talking while riding will
give them funny faces but a too serious face will make riding that horse look
like a lot of work. The impression
you want the rider to make is that they are enjoying a relaxed fun ride.
You might go over what they plan to wear before the photo day so you
can co-ordinate the saddle blanket color, horse color and the riders
outfit color to create a more harmonious effect.
The horse should be the center of attention in the photo not the
florescent lime green shirt of the rider with the pink saddle pad.
As for what
poses to strive for capturing, study magazine photos.
Note which foreleg is in front, the close one or the off leg.
Look at what that does for the hindquarters.
If that photo shows the effect you want, watch your horses legs and time
your shutter to click just before that foreleg reaches that point.
This is where it can be tricky with autofocus.
Autofocus will vary its response time to the shutter depending on light
and distance on every photo. If you
have a manual focus option this might be the time to use it.
Since the horse is traveling a set path parallel to you, focus should not
be a problem once you manually set it. This
leaves you free to concentrate on the leg action.
Take your photo just a fraction before you think you will need to, if you
wait until the leg is where you want it, you are too late and will have missed
the shot. If your camera allows you
to do rapid succession shots you can try that hoping one will have the leg just
right.
At
Liberty
Most of what
is applicable for under saddle also goes for at liberty shots.
What changes is the predictability of the path the horse is going to
travel. With no rider to guide it
the horse will turn, take a path too close to you or too far from you and add
other variables with the lighting that are difficult to deal with.
For liberty shots a couple of helpers just to keep the horse moving in a
confined area. Plan on using twice
the film you would for under saddle. You still have to deal with the same
background problems, as well as lighting and have added a fence to the photo
area that must be presentable and something you want people to see as
representative of your farm. Make
sure that the fence is in good repair because your very best photo will be in
front of the only broken board or an obvious patch that will distract from the
beauty of the horse.
After
the photos come back…
Your
photos now need labels. If
the photos did not come back with negative numbers printed on the back, it is
now your job to do that before the photos get shuffled and your job to do this
becomes more difficult. You need to
label them with a roll designation as well so you do not confuse negative # 12
on one roll with negative # 12 of another roll.
You can assign them with letters or numbers.
You may wish to identify the roll father such as
BW2-14 can mean “Bint Western tack roll 2 – negative number 14”
Cover your negative number labeling
on the back of the photo with a scrap of scotch tape so the ink will not
transfer to the front of the next photo in the stack.
I like to order double prints so I can keep one set of labeled photos with the
negatives.
Cull your photos. Now that you have a pile of culls, go through them one more time with these thoughts in mind. Can this body shot of Ibn when he moved his leg but has a pretty head angle be cropped to a headshot and used on your website? Was an otherwise wonderful photo culled because it was too light or too dark and would a trip to the 1 hour photo shop to do reprints that are lighter or darker save this shot?
Would
cropping save this photo? A photo can look entirely different when cropped.
Experiment with cropping. You
can use post-a-notes to crop photos and leave no damage on the photo.
Learning to crop can improve how you frame the subject in the view
finder. Look at each photo and
decide what it is you like or don’t like about each.
You can learn as much from what you throw away as you can from what you
keep.
|
This example illustrates how a cull photo might be saved with some creative cropping. (Curser will identify horse) |
 |
Throw away
any odd angle photos that distort body proportions as well as any unflattering
photos. Do not keep any photos that
do not have some significant value in showing your horse to good advantage. Do
NOT go through your roll and select photos “you can spare” and send them out
as “better than nothing” to inquiries. A
bad photo is worse than no photo. Keep
in mind that more people will see the photos you send out than those you kept in
your “good stack.” Toss those
cull photos away! They take up
precious storage space that will soon be needed for all those good shots you are
taking.
Get reprints
of the best photos. Make labels for the back of the photo on your computer.
I recommend that you include on your label the horse’s name, sire
and dam, birth year, sex and breeding group, when the photo was taken and the
photographers name. For example “Bint Sweetie (Ibn Studly x Sweetie), 1989 Al
Khamsa Special group mare, May 2001 Sally Shutterbug photo.”
Use tape to attach the labels to the backs of the photos.
Resist the temptation to send out unlabeled photos. Store the labels and
the negatives with the reprints so you can easily see when you need to order
more. I order at least 10 to 20
reprints of any photo I plan to use for advertising or sending out.
The fewer times that the reprint labs get a hold of your negatives, the
longer the negatives will last undamaged. Always
get more reprints before sending off your last photo. Whenever you send off your
last photo, you risk not getting it back and then forgetting to order reprints
before a need for that photo arises again.
![]()
Does this mean you shouldn’t carry your camera sometimes without any preparation just in case some horse might give you a photo opportunity? Carry your camera and you will get some great candid shots! As you know there are always times you will wish “If only I had my camera now.”
Should
you take photos of muddy horses with knotted manes?
Sometimes but maybe not for advertising photos!
Most of the time your horses will look shiny and clean even if not bathed
so do take advantage of those candid opportunities as well.
Farm visitors with children can provide some good opportunities
especially with foals. Again carry
your camera, stuff
your pockets with film and take lots of photos.
Does
all this seem like a lot of work?
Yes, it is. Will
it all be worth it? Yes, most of
the time. Will there be whole rolls that are throw aways?
Yes possibly, but you can still learn from those rolls how to correct
those faults for next time. Will
you be taking the photos you always dreamed of the first time you try?
Probably not but there may be some real gems in there that will encourage
you to keep taking photos and learning what works best for you and your horses.
No gems in the pile? Not a
total loss as you can learn from those rolls and set yourself up for greater
success on the next photo shoot.
Remember it just takes Patience, Practice and Persistence!
![]()
Back to www.BabsonArabians.com